The Equalizer Explained
How to use the 8-band equalizer in Music Speed Changer for Android: boost bass, filter highs and lows, avoid clipping and save presets.

Music Speed Changer has an 8-band graphic equalizer for boosting (amplifying) and cutting (attenuating) parts of a track's sound. From low to high, the bands are centered on 60 Hz, 150 Hz, 400 Hz, 1 kHz, 2 kHz, 4 kHz, 8 kHz and 16 kHz. Each band has its own vertical slider that sets its gain, so you can boost the bass, filter out high frequencies, or bring out a single range. You can show the equalizer with the Equalizer preset, or add it to your own custom editor layout.
Showing the Equalizer
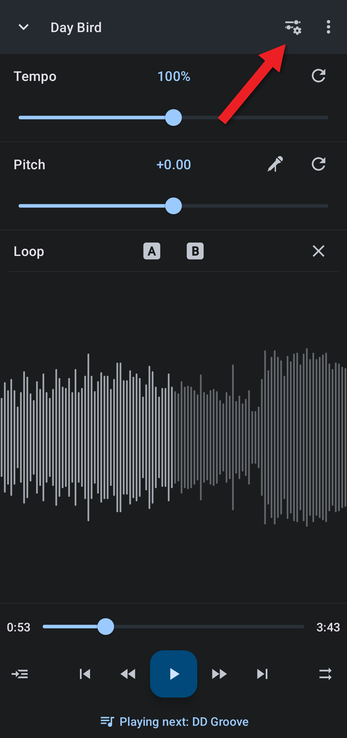
- In the editor, tap the Editor components button (the sliders icon at the top right).
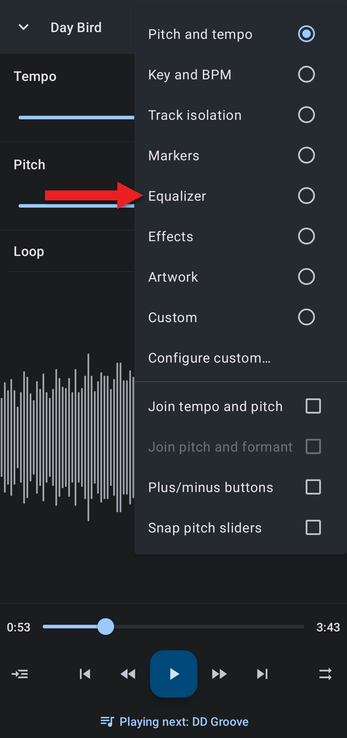
- Choose Equalizer.
Adding the Equalizer to a Custom Layout
If you'd rather see the equalizer together with other controls, add it to your custom layout instead:
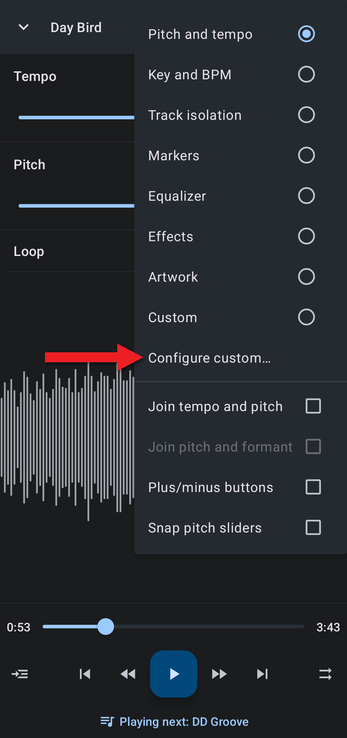
- In the Editor components menu, choose Configure custom….
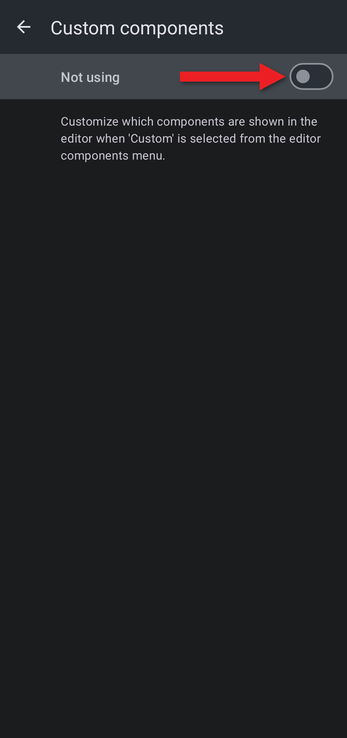
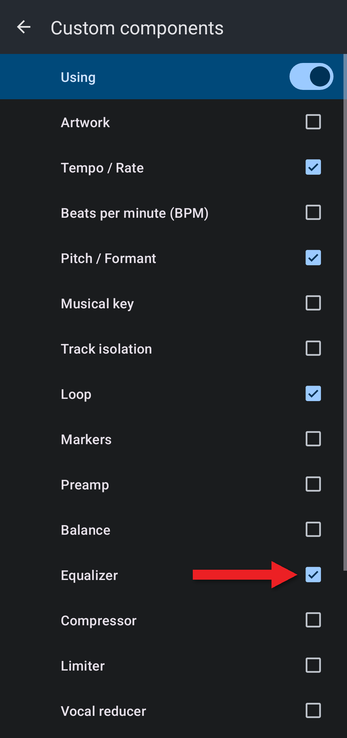
- Turn on the switch at the top of the Custom components screen. It reads Not using while it's off and Using when it's on.
- Tick Equalizer, along with any other components you want.
Using the Equalizer
The Equalizer preset shows the Preamp, Balance and Equalizer controls. They're all off by default; turn the equalizer on with its switch.
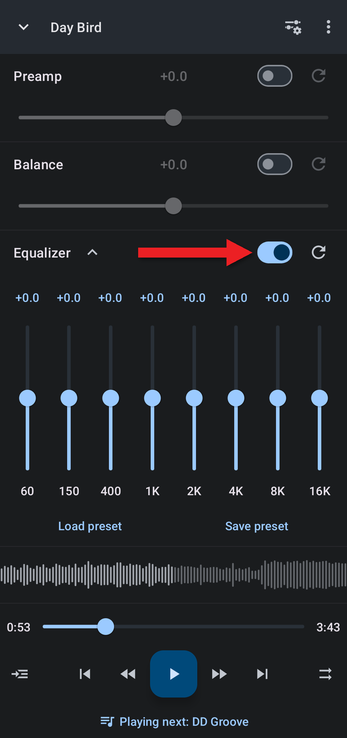
Each vertical slider controls the gain of one band, from −15 dB to +15 dB. From left to right, the bands go from low frequencies (bass) to high frequencies (treble). To enter an exact value, tap the number above a band. The reset button next to the Equalizer switch sets every band back to 0.
Boosting the Bass
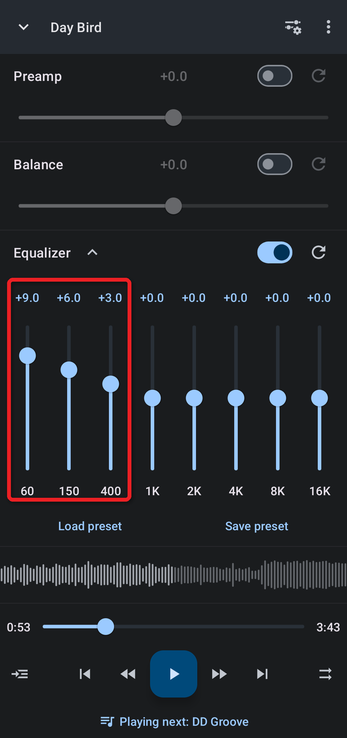
To bring out the bass, raise the sliders on the left, which control the low frequencies.
Filtering Out Low and High Frequencies
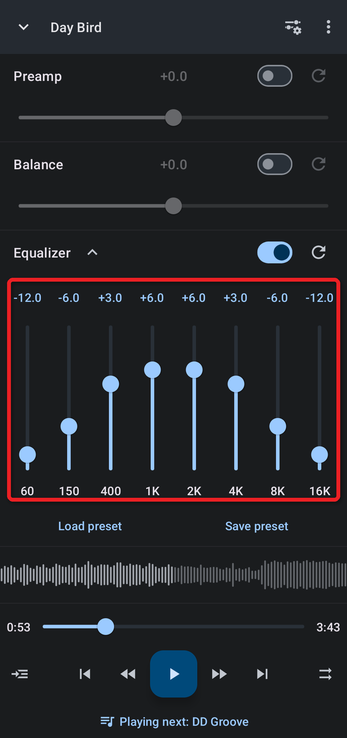
For a low/high filter effect, lower the outermost sliders to cut the lowest and highest frequencies. For the strongest effect, also raise the middle sliders to boost the mid-range.
Avoiding Distortion (Clipping)
Clipping happens when a signal is boosted above its maximum level, and it's common when you boost frequencies with the equalizer. To prevent it, turn on the preamp and lower its gain to leave headroom for the boosted bands.
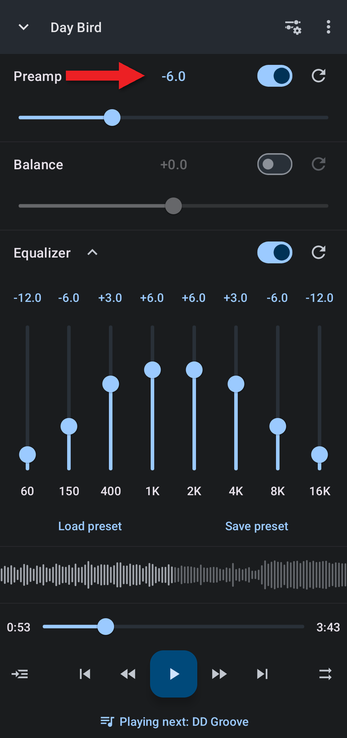
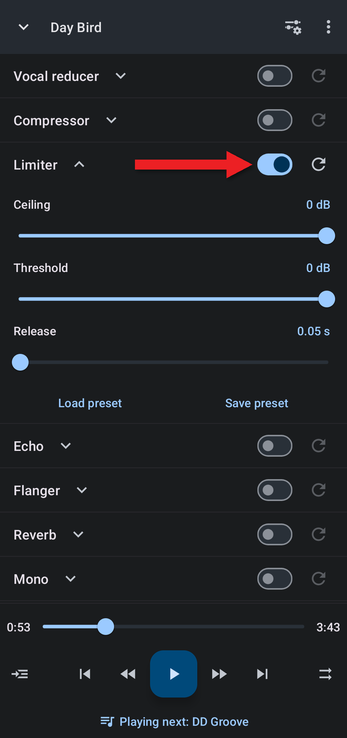
The compressor and limiter effects can help too, and they turn down the frequencies you didn't boost less than lowering the preamp does. The limiter is in the Effects preset, or you can add it to a custom layout. See Audio Effects: Vocal Reducer, Reverb, Echo and More.
Saving Your Settings
Use Save preset to keep equalizer settings you like, and Load preset to use them again on other tracks.
Related Articles
How did we do?
Turning Up the Volume with the Preamp